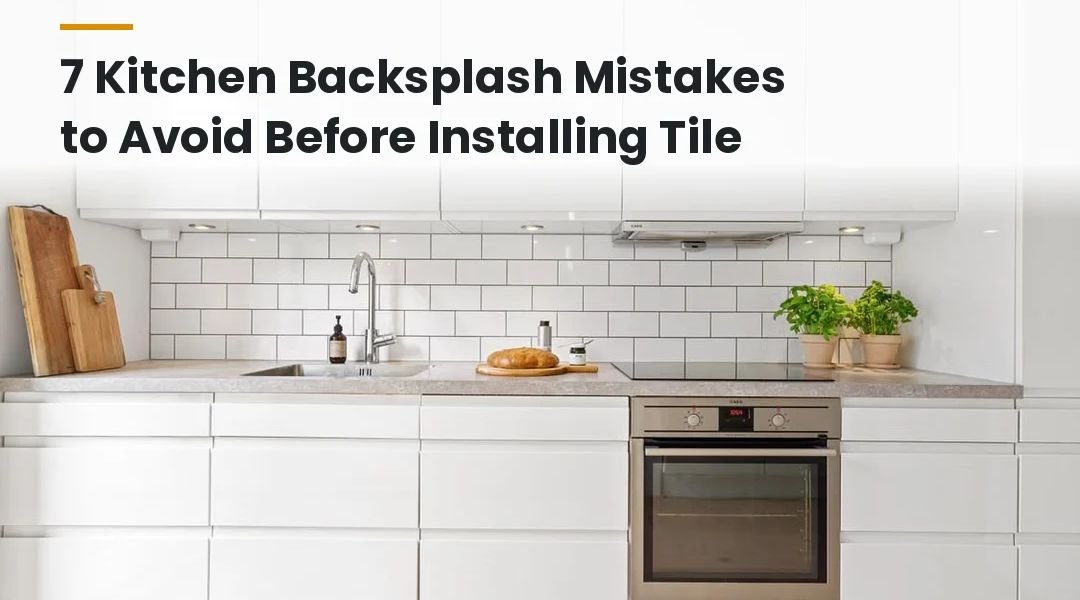
A kitchen backsplash may cover only a small part of your kitchen wall, but it can affect the look, maintenance, and overall cost of your renovation. The right backsplash can connect your cabinets and countertops, while a poorly planned one may leave you with mismatched colors, awkward tile cuts, or unnecessary installation expenses.
Many homeowners choose backsplash tiles by looking at their color or pattern alone. However, the finished result also depends on lighting, grout color, tile placement, wall preparation, and the materials surrounding the backsplash.
After researching interior design for four years, I have found that these smaller planning decisions deserve as much attention as the main design choices. A beautiful tile does not automatically create a well-designed kitchen. It needs to work with the other finishes and suit the way you use the space.
In this guide, you will learn about seven common kitchen backsplash mistakes, how to avoid them, and what to check before buying tiles or starting installation.
Choosing a Backsplash After Looking at a Small Tile Sample
One common mistake is selecting a backsplash based on a small sample viewed in a showroom. A tile may look bright white under store lighting but appear creamy, gray, or slightly yellow when installed in your kitchen.
The reason is simple: light changes how we see colors. Natural daylight, warm LED bulbs, cabinet finishes, and countertop materials can all influence the appearance of a tile.
Natural stone introduces another consideration. Marble and other stones can have noticeable differences in veining, texture, and color. Even tiles made by manufacturers may vary slightly between batches.
How to choose the right tile sample
Before purchasing enough material for your kitchen, follow these steps:
- Get a full-size sample: A complete tile gives you a better idea of its texture, finish, and pattern.
- Place it beside your countertop: Check whether the colors and undertones work together.
- View it in different lighting: Look at the sample during the day and under your usual kitchen lights.
- Compare several tiles: This is particularly helpful when choosing patterned tiles or natural stone.
- Check the finish: Glossy, matte, and textured surfaces reflect light differently.
For example, if your cabinets are warm white and your countertop has beige undertones, a cool gray backsplash may create a contrast you did not expect. That contrast might be intentional, but you should see it before committing to the purchase.
Interior design tip: Keep your cabinet, countertop, flooring, hardware, and backsplash samples together. This makes it easier to judge the complete color palette instead of choosing each material separately.
Choosing a Backsplash That Competes With Your Countertop
Your backsplash and countertop occupy neighboring surfaces, so their colors and patterns should work together.
Imagine a kitchen with a heavily veined marble countertop and a colorful mosaic backsplash. Both materials may look attractive individually, but combining them can create too much visual activity.
The solution is to decide which surface should attract the most attention.
Let one material be the main feature.
If you have a countertop with prominent veins or a strong pattern, consider a simpler backsplash. Plain ceramic tiles, subtle textures, or soft neutral colors can complement the countertop without competing with it.
If you prefer a decorative backsplash, a quieter countertop may give the tile pattern more room to stand out.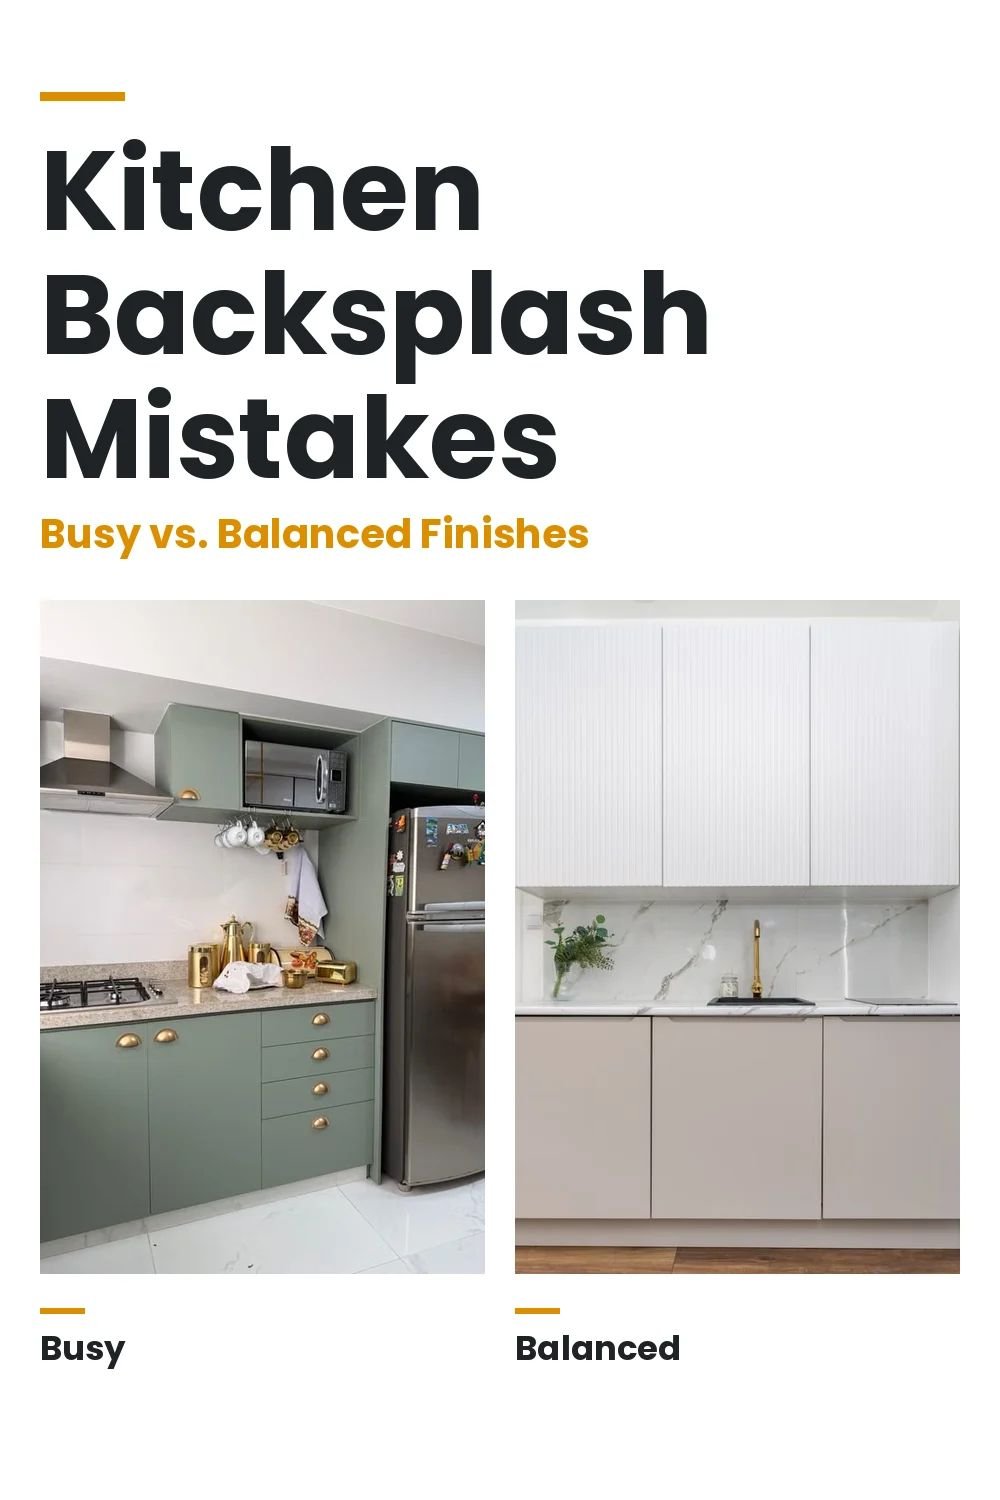
Here are two combinations to consider:
- Bold countertop: Pair it with a simple backsplash that picks up one of the countertop’s colors.
- Decorative backsplash: Use a countertop with a relatively restrained pattern.
You do not have to use neutral colors throughout the kitchen. A deep green backsplash, blue ceramic tiles, or a geometric pattern can work well when the surrounding materials support the choice.
Check the undertones.
Undertones are the subtle warm or cool qualities within a color. Two white tiles may look similar at first but appear very different when placed next to each other.
For a more coordinated result, compare the backsplash sample with the countertop and cabinets under the same lighting. Include flooring and cabinet hardware in the comparison if possible.
My recommendation: Choose the countertop and backsplash as a pair. If one material already has a strong pattern, let the other contribute texture, color, or a simpler finish.
Choosing a Tile Pattern Without Calculating Installation Costs
A tile pattern can change the entire appearance of a kitchen. However, the installation requirements should be considered before you buy the material.
Straight-set layouts are generally straightforward to plan. More detailed patterns, such as herringbone or chevron, may require additional alignment, measuring, and cutting.
The tile material also matters. Certain porcelain tiles can be difficult to cut, while natural stone may require specialized handling and finishing.
Why some backsplash patterns cost more
Comparison of straight-set and herringbone kitchen backsplash tile patterns.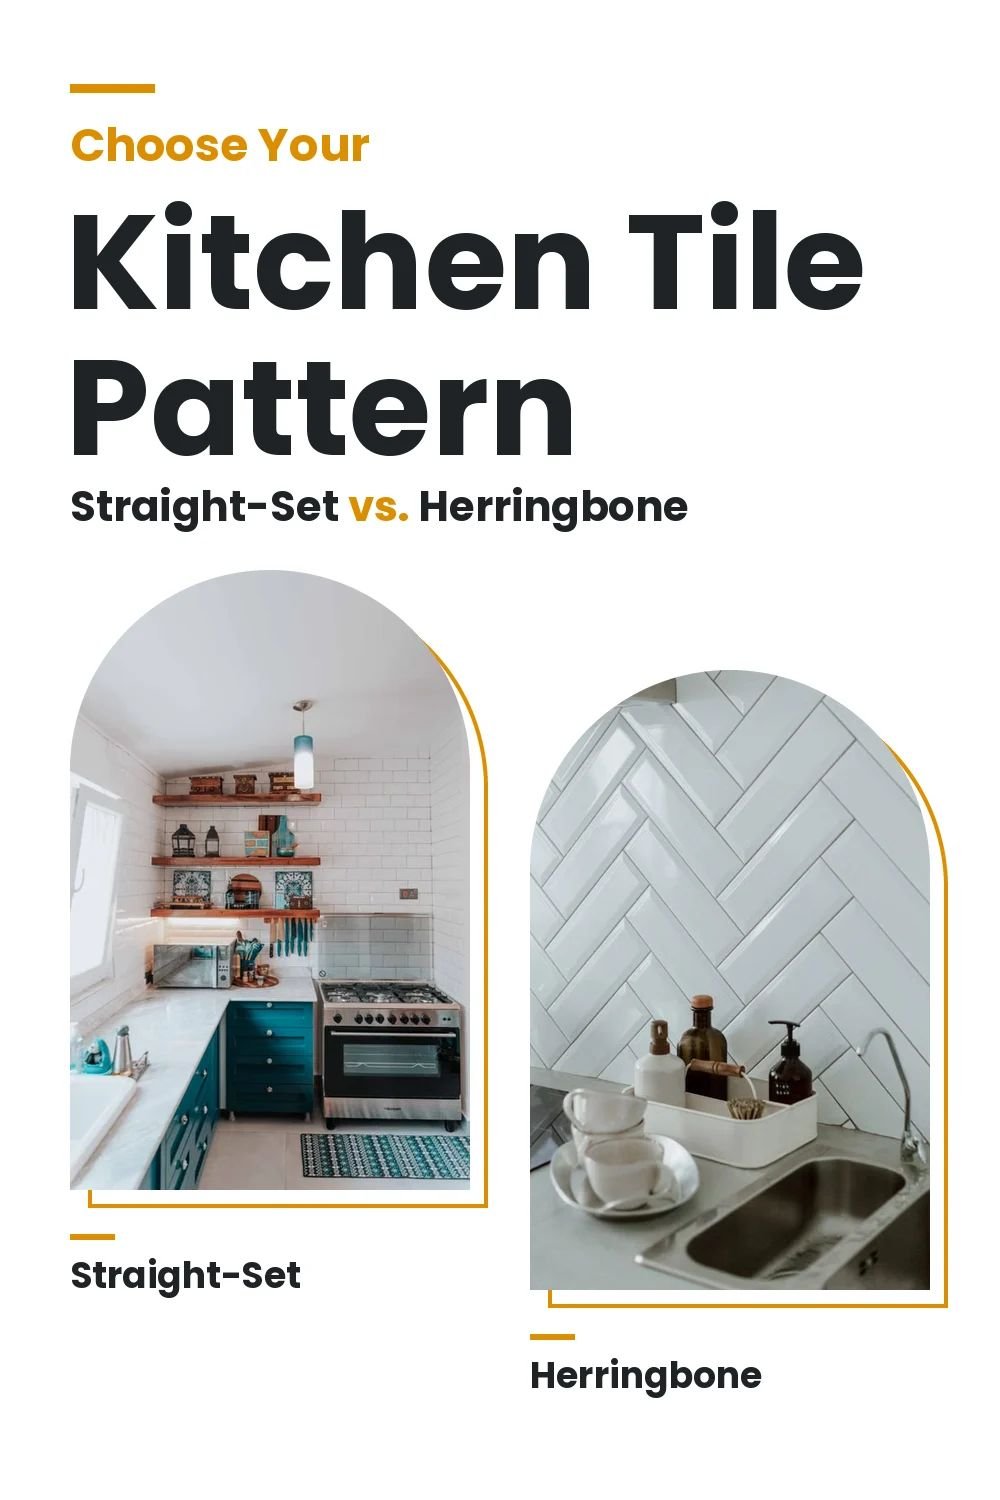
Consider a herringbone backsplash. Its angled arrangement creates a distinctive look, but the installer must maintain consistent lines around corners, windows, cabinets, and electrical outlets.
Poor planning can result in narrow tile pieces, uneven pattern alignment, or extra work during installation.
A simple stacked or running-bond layout may be more practical if you have a limited budget or plan to install the backsplash yourself. The actual cost depends on the tile, wall condition, layout, labor rates, and complexity of the job.
What to include in your backsplash budget
Do not calculate the cost using the tile price alone. Consider the following expenses:
- Tile adhesive and grout.
- Edge profiles or finishing pieces.
- Wall preparation and repairs.
- Cutting tools and installation labor.
- Extra tiles for cuts and accidental breakage.
- Fixture adjustments, if required.
Measure the backsplash area before ordering materials. Then ask your installer how much extra tile is appropriate for your chosen pattern and the number of corners or openings.
For a complicated layout, request a quote before purchasing the tiles. Confirm whether the price includes preparation, cutting, edge finishing, and cleanup.
Practical advice: Choose a pattern that fits both your design goals and your budget. A simple layout can look attractive when the tile, grout, and surrounding finishes are chosen carefully.
Installing a Slab Backsplash Without Planning the Stone Layout
A slab backsplash uses a large piece of material, such as quartz or marble, instead of individual tiles. It is sometimes called a counter-to-wall slab backsplash or countersplash.
This design can create a continuous appearance between the countertop and the wall. With fewer grout joints, the surface may also be easier to wipe clean.
However, a slab backsplash requires careful planning because the stone’s natural pattern can affect the finished design.
Why you should inspect the actual slab
A small sample cannot show the full veining and color variation of a large stone slab.
Imagine that you choose marble because you like its long, dramatic veins. If the fabricator cuts the slab without considering those veins, the finished backsplash may not look the way you expected.
This is especially important behind a cooktop or in another highly visible area.
What to check before fabrication
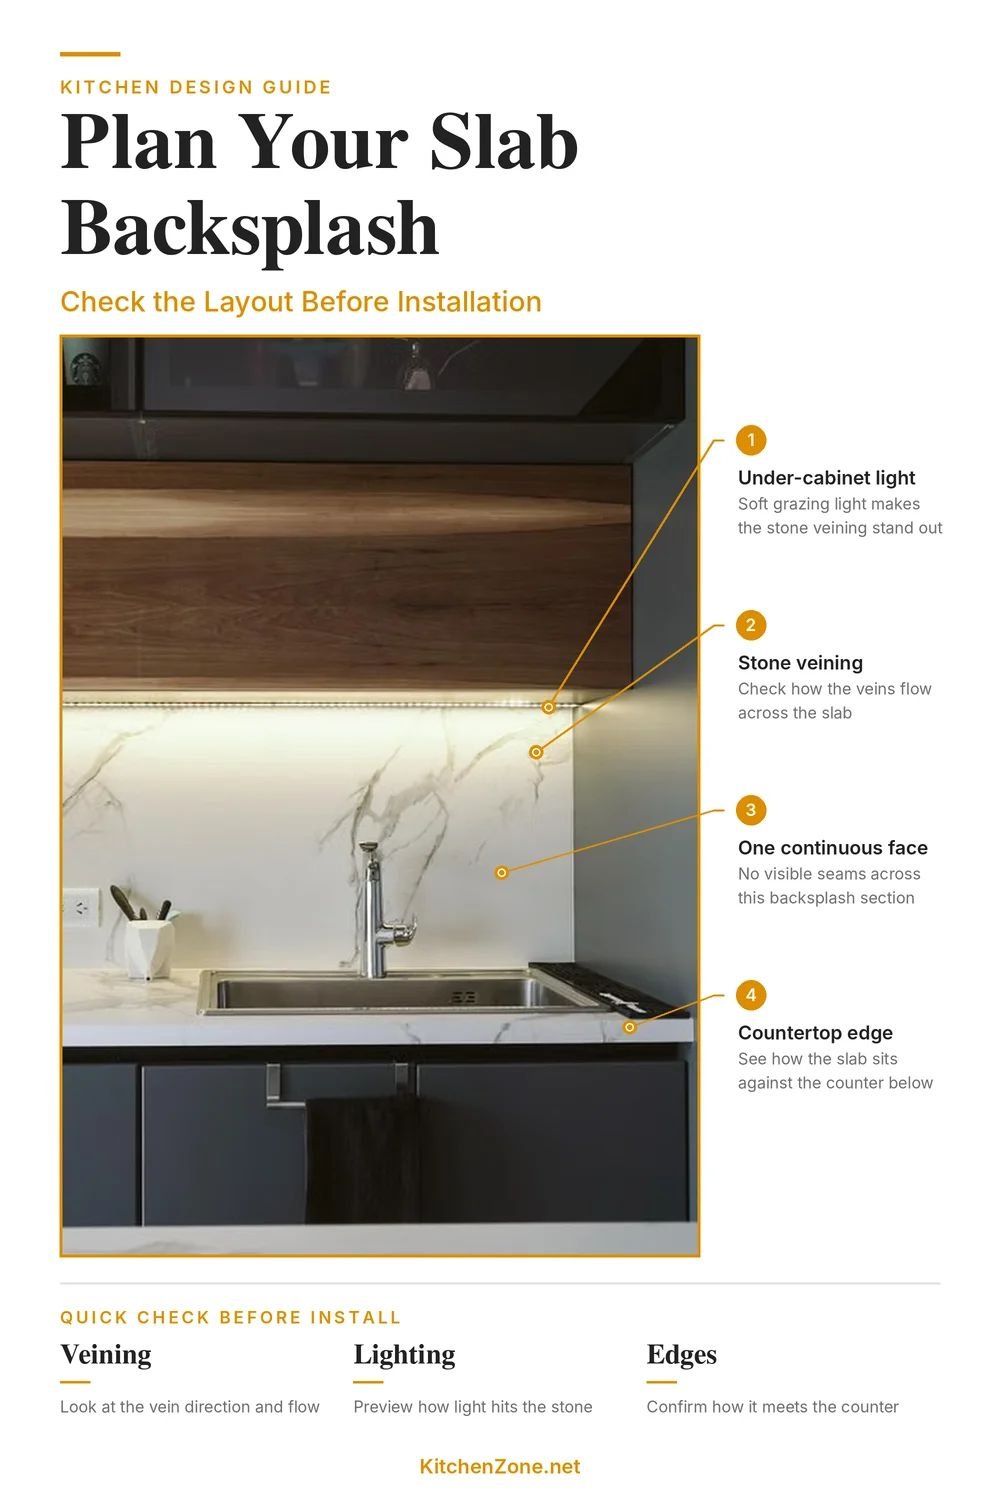
If possible, inspect the actual slab or request a clear digital layout before approving the cuts.
Review these details:
- The position of prominent veins and distinctive markings.
- How the pattern will continue across separate sections.
- The placement of outlets, sink cutouts, and other openings.
- The relationship between the countertop and backsplash patterns.
- The visible edges and joints.
You may also hear about bookmatching, a technique that places matching stone slabs together to create a mirrored pattern. It requires suitable slabs and careful fabrication, and it may increase the project cost.
A slab backsplash is not automatically cheaper than tile. Material, fabrication, transportation, installation, and the complexity of the cuts all affect the final price.
Before approving the work, review the complete layout. Changing a slab after fabrication can be expensive, so make sure the visible pattern and cut positions meet your expectations.
Treating Grout Color as an Afterthought
Grout fills the joints between tiles, but its appearance can change the way the entire backsplash looks.
A grout color close to the tile creates a relatively continuous surface. A contrasting color emphasizes individual tiles and makes the pattern more noticeable.
Choosing grout only after the tiles have been installed can lead to a result that differs from your original plan.
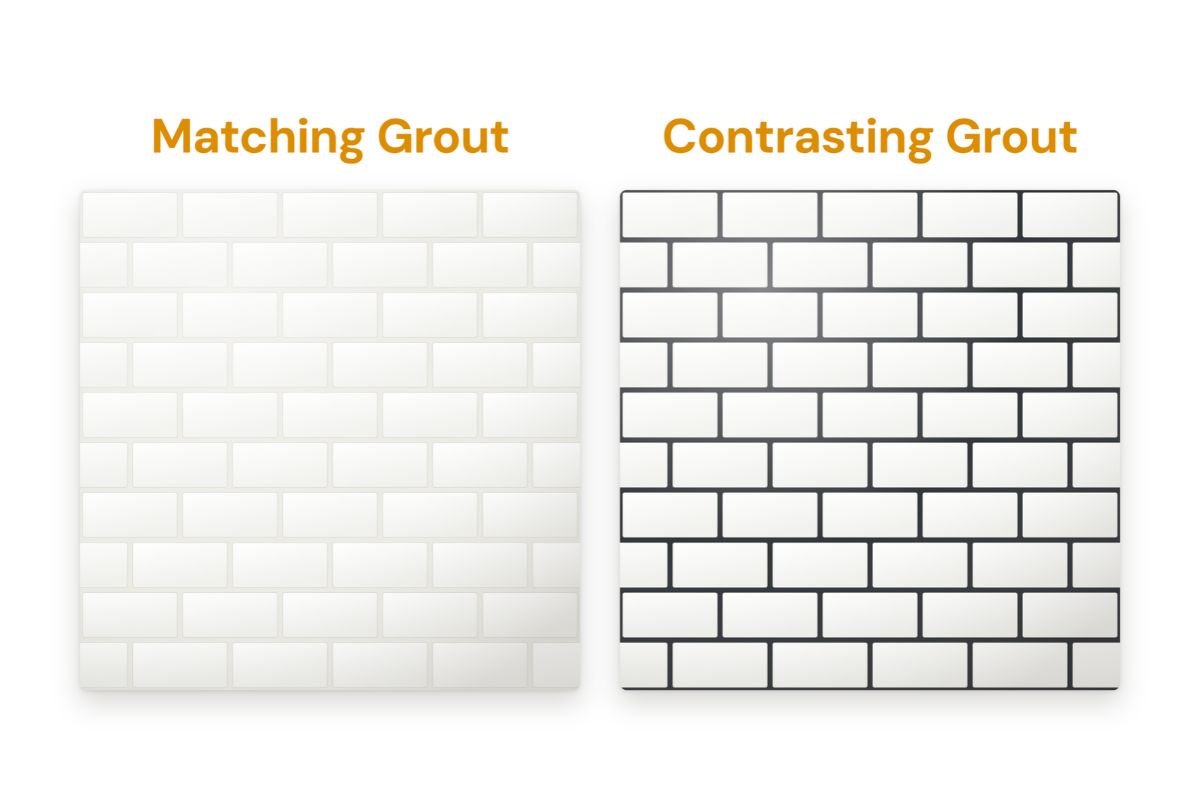
Matching grout for a subtle appearance
Matching grout blends with the tile and reduces the visual separation between individual pieces.
For example, white subway tiles with white or off-white grout create a softer appearance than white tiles with dark grout.
This approach can work well if you want the backsplash to feel calm and understated.
Contrasting grout to highlight the pattern
A darker grout can emphasize the shape and arrangement of subway, hexagonal, or herringbone tiles.
For example, white subway tiles with charcoal grout create clear lines that make the layout stand out.
However, strong contrast may make a small-tile backsplash feel visually busy, particularly if the countertop already has a bold pattern.
Neither approach is automatically better. Your choice should depend on the tile, the surrounding materials, and the appearance you want.
How to select the right grout
Before installation:
Compare grout color samples with your actual tile.
Make a small sample board if practical.
Allow the grout to dry according to the manufacturer’s instructions.
Check the finished combination under your kitchen lighting.
Confirm that the grout type and joint width are suitable for the tile.
Maintenance also matters. Grout can collect dirt and may discolor over time, depending on the product, color, and cleaning routine. Some tiles and grout products require specific cleaning methods.
Ask your tile supplier or installer which grout is suitable for your chosen materials.
Design tip: Select the tile and grout together. This gives you a clearer idea of the finished pattern before installation begins.
Ignoring Where the Backsplash Starts and Ends
A backsplash can look unfinished if the tiles stop at an awkward point or leave exposed edges without a suitable finish.
This problem often appears where upper cabinets end, around windows, beside appliances, or at the point where the backsplash meets a painted wall.
Planning these boundaries before installation helps create a cleaner result.
Choose an appropriate tile edge finish
When the edge of a backsplash remains visible, it needs a suitable finish.
Common options include:
- Bullnose tiles: These have a finished, rounded edge and may be available in coordinating styles.
- Metal edging profiles: These create a defined border and are available in different finishes, including black, silver, and brass.
- Mitered edges: Some tiles and stone materials can be cut at an angle to create a neat corner, depending on the material and installation method.
Not every tile has a matching bullnose piece. Check the available finishing options before placing your order.
Decide how high the backsplash should go
A common layout extends the backsplash from the countertop to the bottom of the upper cabinets. However, you can also use a taller backsplash or continue the tile to the ceiling in selected areas.
A full-height backsplash can create a strong visual feature behind a range hood or around open shelving. It can also reduce interruptions in the wall finish.
The best height depends on your kitchen layout, preferred style, and budget. More coverage generally requires additional material and labor.
Before installation, review the following areas:
- Behind the range hood: Decide where the tile should stop and confirm the appliance’s mounting requirements and clearances.
- Around upper cabinets: Plan how the backsplash will finish where the cabinets end.
- Around windows: Check how the tile will meet the window trim and whether additional edge pieces are needed.
- At outside corners: Decide how the tile edges will meet and whether a profile or another finish is appropriate.
- One simple planning method is to mark the proposed backsplash boundaries on the wall with painter’s tape. This lets you visualize the height and stopping points before any tiles are installed.
Failing to Prepare the Wall and Plan Fixtures Before Tiling
A backsplash should be planned alongside everything else that occupies the kitchen wall.
Electrical outlets, shelves, range hoods, wall-mounted accessories, and other fixtures can affect tile placement. If you ignore them until installation begins, you may need extra cuts or adjustments after the work has started.
Wall preparation is equally important. Tile adhesive cannot compensate for every damaged, loose, or unsuitable surface.
Plan shelves and wall fixtures in advance
Open shelves can look attractive against a tiled backsplash, but their mounting points need to be considered before installation.
Adding tile changes the finished wall thickness. Existing screws may no longer be suitable, and the correct mounting method depends on the shelf brackets, wall structure, tile material, and expected load.
Decide where the shelves will go and check the mounting requirements before tiling. This can help avoid unnecessary drilling and make it easier to coordinate the brackets with the tile pattern.
Check electrical outlets before installation
Tile adds thickness to the wall, which can affect the fit of electrical outlets and cover plates.
Depending on the existing installation, approved box extenders or other suitable components may be required. Electrical boxes must remain properly installed and meet applicable local requirements.
If the work involves moving an outlet, modifying wiring, or adjusting an electrical box, consult a qualified electrician.
You should also plan the tile cuts around outlets in advance. This can help avoid very narrow tile pieces and create a more balanced layout.
Coordinate the range hood
If you are installing a new range hood, confirm its location and mounting requirements before the backsplash work begins.
Check the manufacturer’s instructions for mounting points and required clearances. The tile layout should accommodate these requirements rather than interfere with them.
The same principle applies to shelves and other wall-mounted fixtures: determine their locations before committing to the final tile arrangement.
Prepare the wall properly
Before installation, check that the wall is sound, clean, and suitable for the chosen tile and adhesive.
Damaged surfaces, loose paint, moisture problems, and uneven areas may require attention first. The correct preparation method depends on the existing substrate and the manufacturer’s instructions.
Do not assume that adhesive will solve every wall problem. If you are unsure whether the surface is suitable, ask a qualified tile installer to inspect it before proceeding.
Important: Treat the backsplash as part of the complete kitchen plan. Coordinating the wall, fixtures, electrical details, and appliances before installation can help prevent avoidable problems.
Bonus Tips for Choosing a Kitchen Backsplash That Works for Your Home
Avoiding the seven mistakes above is a good starting point. These additional checks can help you make a decision that suits your kitchen and your daily routine.
Match the backsplash to your kitchen style
Your backsplash should complement your cabinets, countertops, flooring, and hardware.
For example, simple ceramic tiles can suit many kitchen styles. Subway tiles can look traditional or contemporary depending on their color, layout, and grout. Natural stone can add texture and variation, while patterned tiles can introduce color and visual interest.
Rather than choosing each finish separately, compare the materials together before making a final decision.
Consider cleaning and maintenance
Keep your daily kitchen routine in mind.
The backsplash behind a cooktop may receive more grease and food splashes than a wall beside a lightly used preparation area. Smooth, accessible surfaces are generally easier to wipe clean than heavily textured ones.
Grout joints also need regular cleaning. Some natural stone products may require sealing or other care, depending on the specific material and manufacturer.
Before purchasing a tile, read its cleaning instructions and consider how much maintenance you are comfortable doing.
Calculate the full project cost
The tile price is only one part of a backsplash renovation.
Based on your project, you might also need to plan a budget for:
- Adhesive, grout, and finishing profiles.
- Wall repairs and preparation.
- Cutting, fabrication, and installation labor.
- Extra tiles for cutting waste and breakage.
- Adjustments to fixtures or electrical components.
Compare the total estimated cost of different materials and layouts. A more affordable tile may be a better fit for your project if it meets your design, durability, and maintenance requirements.
Review the layout before work begins
Before approving the installation, check the tile arrangement, grout color, edge details, outlet positions, and stopping points.
For slab backsplashes, review the actual stone and approve the proposed cuts. For tiled backsplashes, confirm how the pattern will align around windows, cabinets, and corners.
These decisions are easier to make before installation than after the materials have been fitted.
What is the most common kitchen backsplash mistake?
One common mistake is choosing a tile based only on its showroom appearance. Lighting, countertop colors, cabinet finishes, and grout can all change the final look. Always compare tile samples with your existing kitchen materials before buying.
Should a backsplash match the countertop?
A backsplash does not need to match the countertop exactly. The two surfaces should complement each other. If your countertop has a bold pattern, a simpler backsplash can help balance the design. If the backsplash is the main feature, a quieter countertop may work better.
What backsplash color is easiest to coordinate?
White, warm off-white, beige, and soft gray can work with many kitchen finishes. However, the best choice depends on your cabinet color, countertop undertones, lighting, and personal preference. Test samples in your kitchen before making a final decision.
Is matching grout or contrasting grout better?
Matching grout creates a more continuous appearance, while contrasting grout makes the tile pattern more visible. Choose based on the effect you want and how the grout works with your countertop and cabinets.
Is a slab backsplash better than tile?
Neither option is always better. A slab can create a continuous surface with fewer grout joints, while individual tiles offer a wide range of patterns, sizes, and price points. Compare material, fabrication, installation, and maintenance costs before deciding.
How high should a kitchen backsplash be?
A common option is to extend the backsplash from the countertop to the bottom of the upper cabinets. You can also choose a taller or full-height backsplash for selected areas. Consider the kitchen layout, appliance requirements, desired appearance, and total cost.
Can I install a kitchen backsplash myself?
Some homeowners can complete a straightforward tile installation with suitable tools and preparation. More complex patterns, natural stone, difficult cuts, and uneven walls may require professional help. Electrical changes should be handled by a qualified electrician.
Choosing a kitchen backsplash involves more than finding a tile with an attractive color or pattern. Everything from materials and lighting to grout, layout, and installation affects the end result.
Before beginning your project, avoid these seven mistakes:
Choosing a tile without testing a sample in your kitchen.
Pairing a busy backsplash with an equally busy countertop.
Ignoring installation costs when selecting a pattern.
Approving a slab without reviewing its layout.
Choosing grout as an afterthought.
Leaving tile edges and stopping points unplanned.
Neglecting wall preparation and fixture placement.
Take time to compare samples, plan the layout, review maintenance requirements, and calculate the full project cost. If your project involves complicated cuts, heavy stone slabs, electrical changes, or uncertain wall conditions, seek advice from a qualified professional.
A well-planned backsplash should suit your kitchen, fit your budget, and be practical to maintain. Careful decisions before installation can help you avoid unnecessary expenses and achieve a finish you will be happy with.